SSO - Azure AD
To set up Single sign-on with Starmind you need to follow all the steps below.
1. Create a new Enterprise Application
-
Go to Azure Active Directory / Enterprise Application
-
Create a new application
-
Choose "Non-gallery application"
-
Enter "Starmind" as a name and click "add"
2. Setup Single sign-on
-
Click in the menu on "Single sign-on"
-
Select "SAML"
-
Upload the metadata file which you received from Starmind

3. Setup the Claims
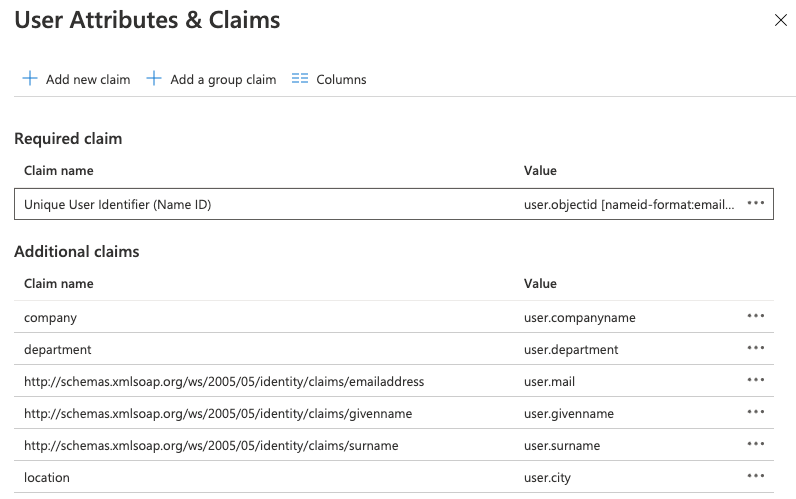
- When you have set up a Single sign-on adjust the "User Attributes & Claims" in the second step

-
Check the Unique User Identifier (Name ID). This should be an attribute that is unique for every user. Also, it should not change over time. A good attribute is user.objectid.
-
Add all attributes by clicking on " + Add new claim" ( You can find a list of all required attributes here)

a) Add the name and namespace as it is defined by Starmind here.
b) "Source" needs to be "Attribute"
c) Choose in Source attribute the field you want to send to Starmind from your Active Directory
4. Role Management (optional)
-
Go to the section where you can manage the claims
-
Click on "add a group claim"

- Select which groups should be transmitted to Starmind & define which source attribute should be transmitted.
Using Role Management
You need to reach out to Starmind and tell us which groups you want to have configured. We need to make some adjustments on our end before it works.
Updated 2 months ago
