Import Users
How to bulk import users via an Excel spreadsheet
If you choose to import new users in-bulk via an excel spreadsheet, please take time to read this tutorial carefully.
To make the process straightforward, we created an excel template. To begin the bulk user import, you first need to download the spreadsheet.
The upload only accepts CSV files, so remember to save your template as a CSV file — it's easy if you stick to the tutorial.
-
Go to your Admin area > App settings > User management > Import users.
-
Download the excel spreadsheet from the Import users page. Make sure to always download the latest version.
-
Open the excel template and add the users you want to import. The following columns are mandatory:
- First name
- Last name
Please note
- The user import only supports creation of new user. Updating and deleting existing users is not supported.
- There are three options for the column titled Gender: m, f, or u (for undefined)
- Country code must be a valid (ISO - 2AF) country code and must be in lower case letters
- Gender and country codes should be written in lowercase
- Use the following date format for the column Employment Start: yyyy-mm-dd (see chapter How to format the Employee Start Date in Excel)
- Every knowledge space has its unique ID. The corresponding ID must be added if you want to assign a question to a knowledge space. You can find an overview of the knowledge spaces and their IDs in Admin Area > Content management > Knowledge spaces.
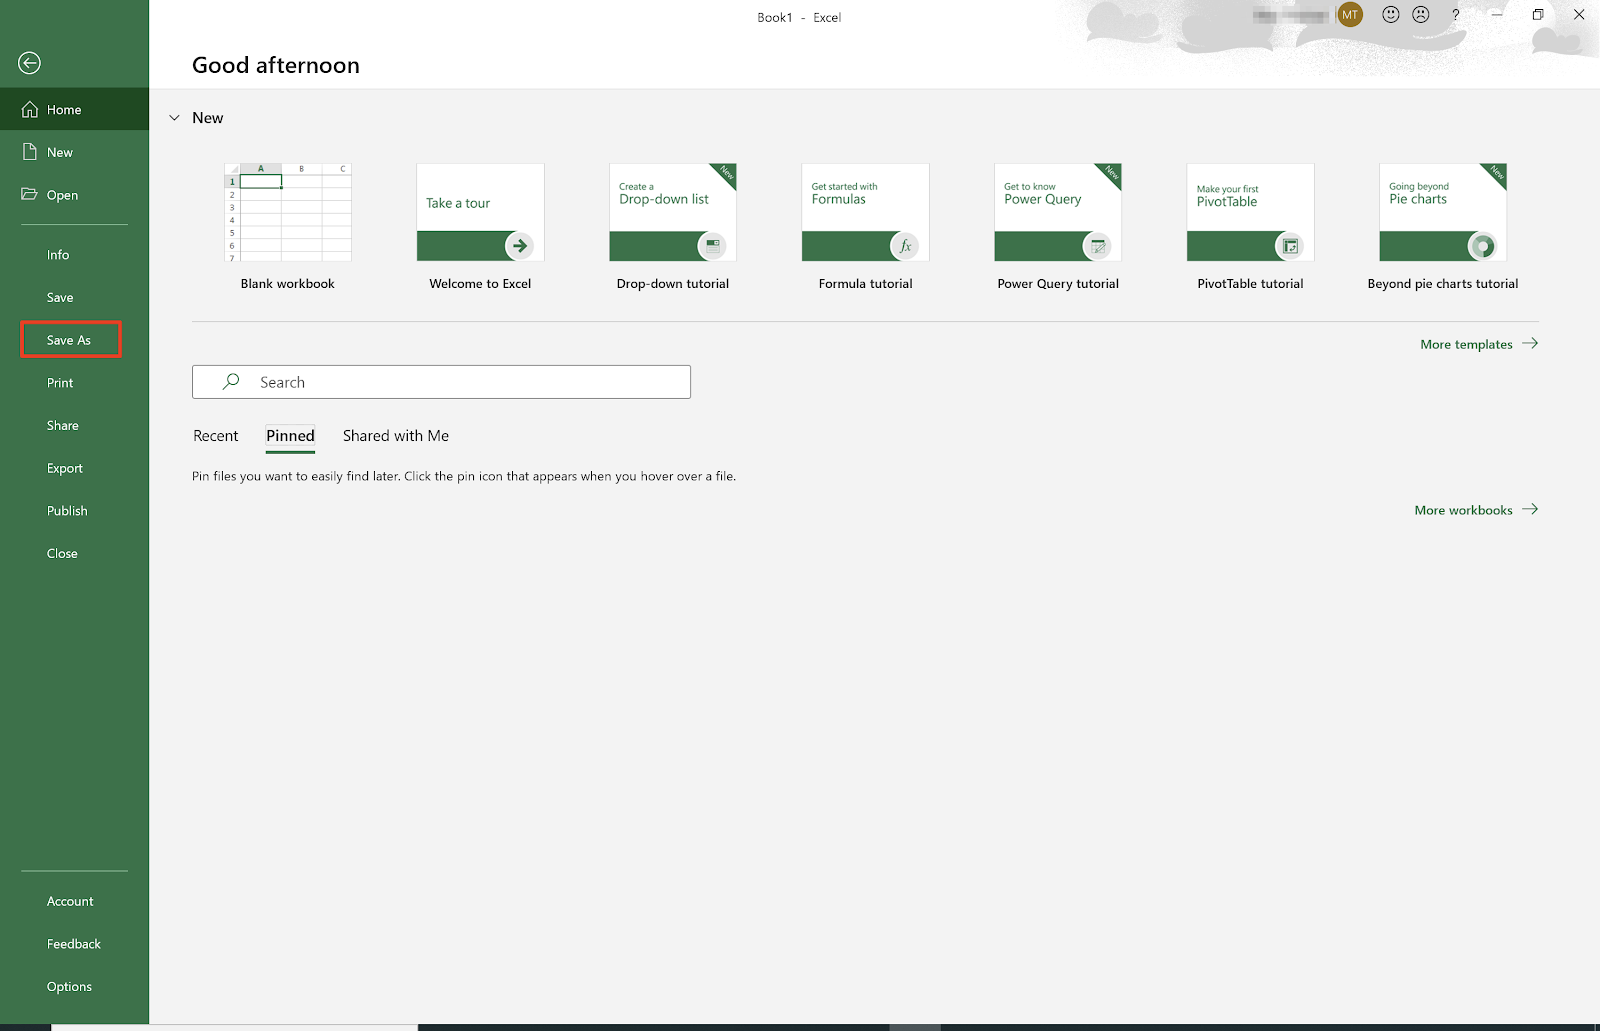
- When all required user information is filled in, make sure to save the file as CSV (UTF-8 formatted). To do this, click on File.

- Next click on Save As

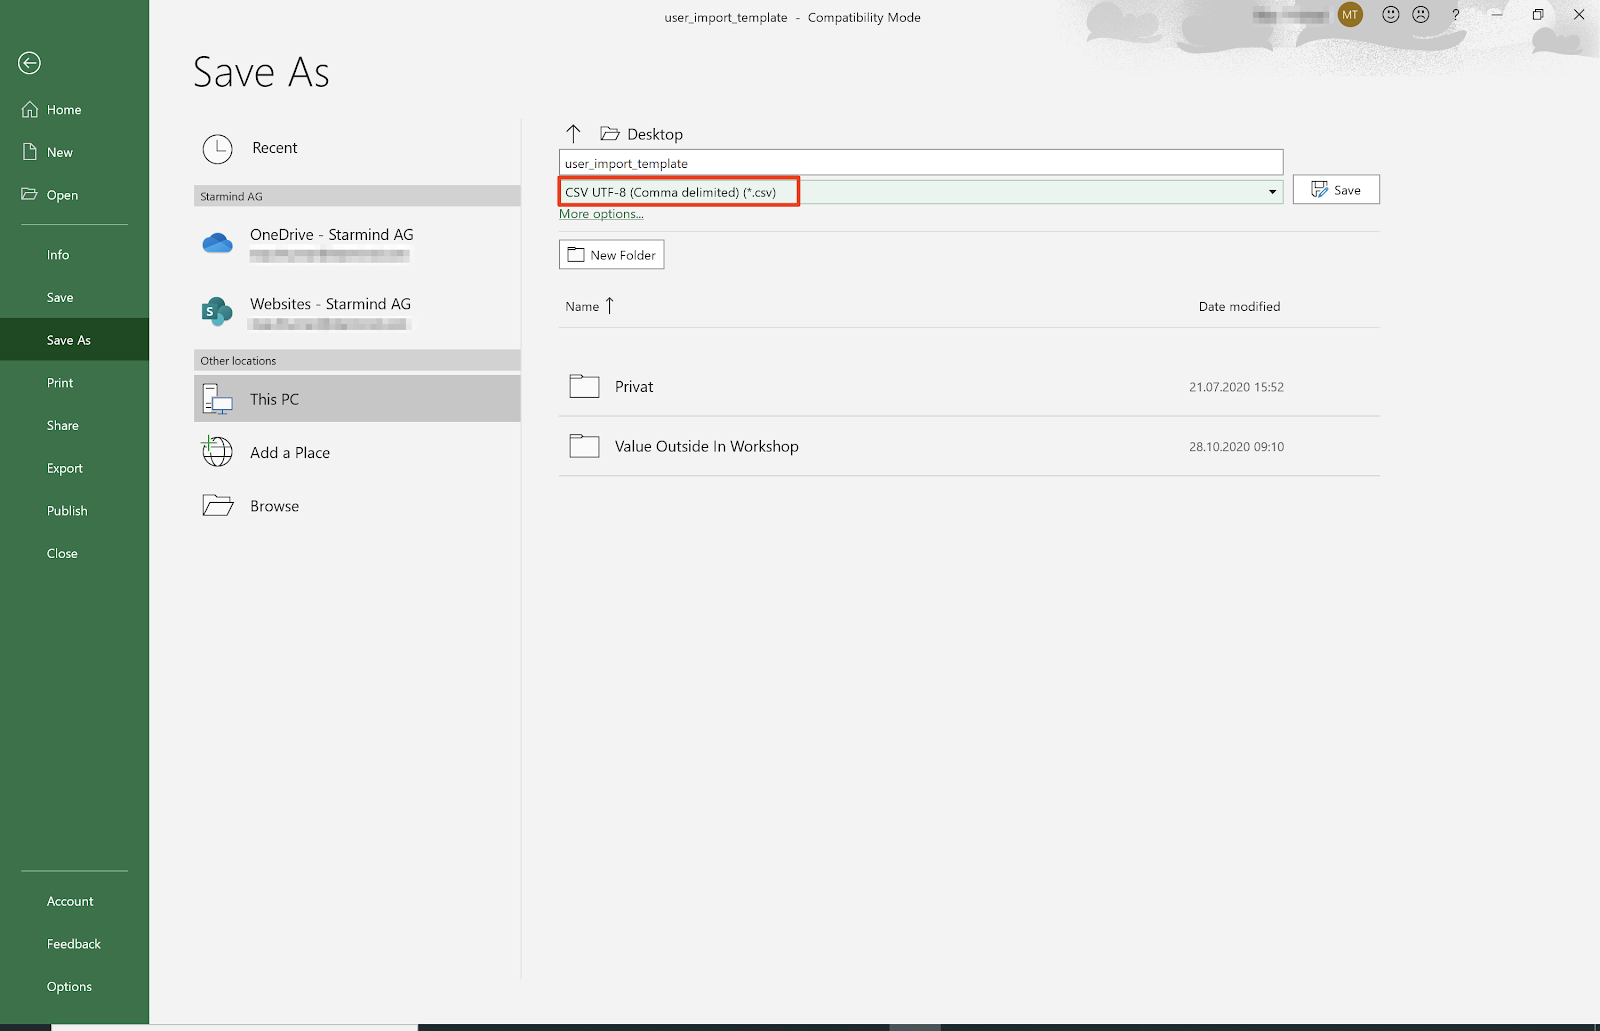
- For the last step, make sure to select CSV UTF-8 (Comma delimited) (*.csv) as the file format. This step is crucial for the user import to work. Finally, click on Save.

-
Now select and upload your CSV file on the Import users page.
-
In the final step, confirm the selected file by clicking on Import File.
-
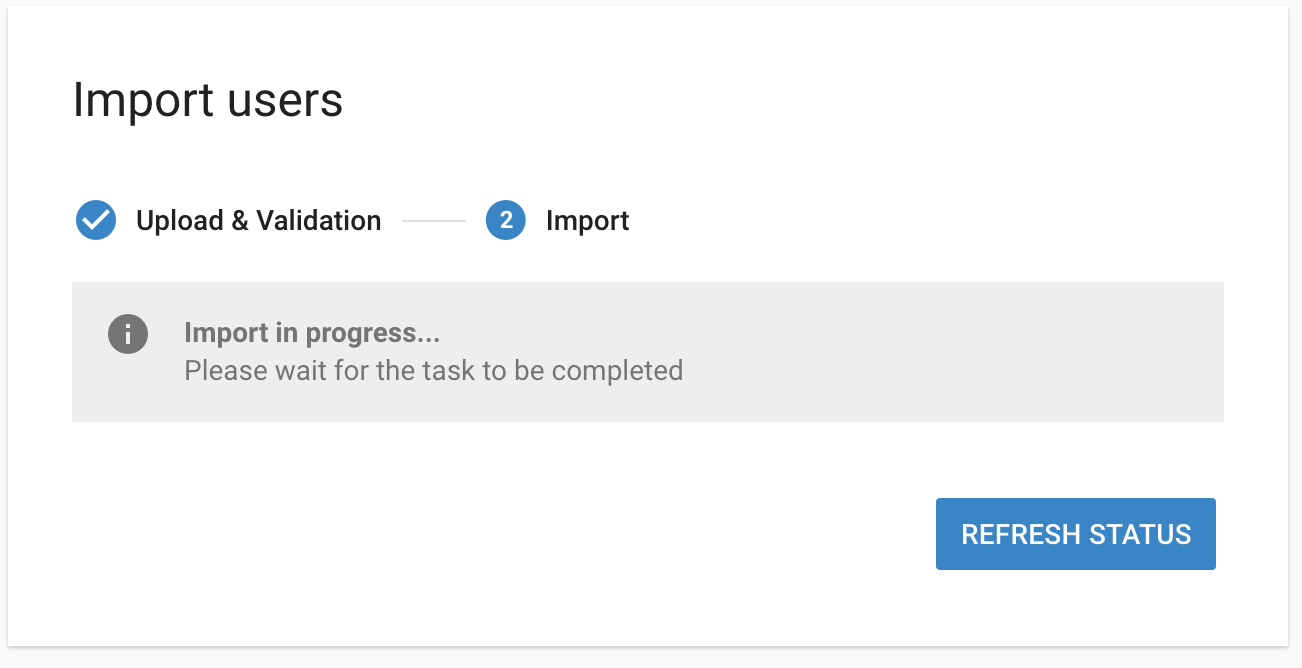
You’ll be able to see the import’s progress as it uploads. Please note, if you accidentally close your browser window, you won’t cancel the import.

How to format the Employee Start Date in Excel
Formatting dates in Excel can be tricky. To ensure that you entered the Employee Start date in the right format, please do the following:
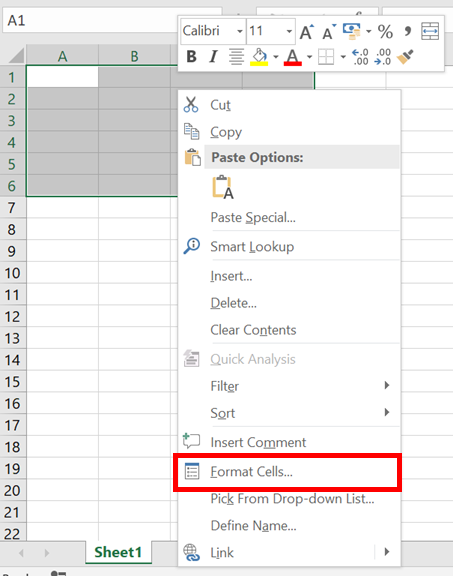
- Right click on the Employee Start date field
- You will see a context menu where you need to click on Format Cells...

- In the next view select Date and then the type yyyy-mm-dd.
Updated 3 months ago
